Follow this step-by-step guide to create, edit, and manage your website header using Liquid Templates and Elementor.
Creating or Editing a Header Template
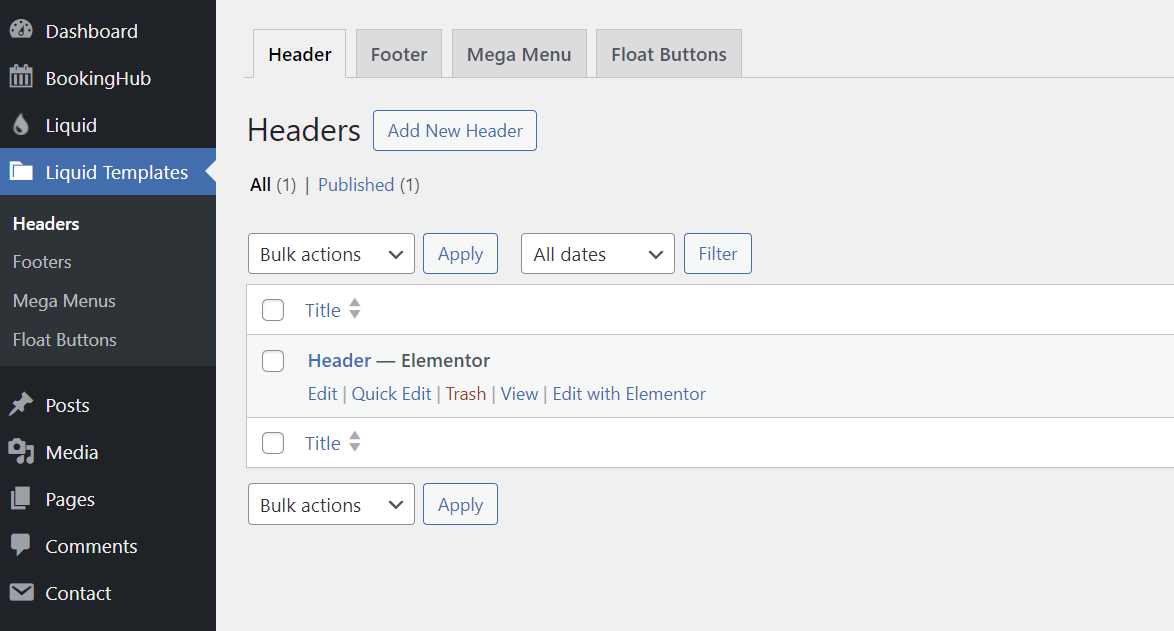
1. Go to Liquid Templates > Headers
From your WordPress dashboard, navigate to:
Liquid Templates → Headers
Here, you will see a list of available header templates.
2. Click on Edit with Elementor
If you already have a header, click Edit with Elementor.
If you don’t have a header yet, click Add New Header, publish it, then click Edit with Elementor.
Importing a Pre-built Header Template (Optional)
3. Once Elementor opens:
If you already have a header, you’ll see its content in the editor.
If the header is empty, you can import a ready-made template.
3.1 Click on the HotelHub Collections icon
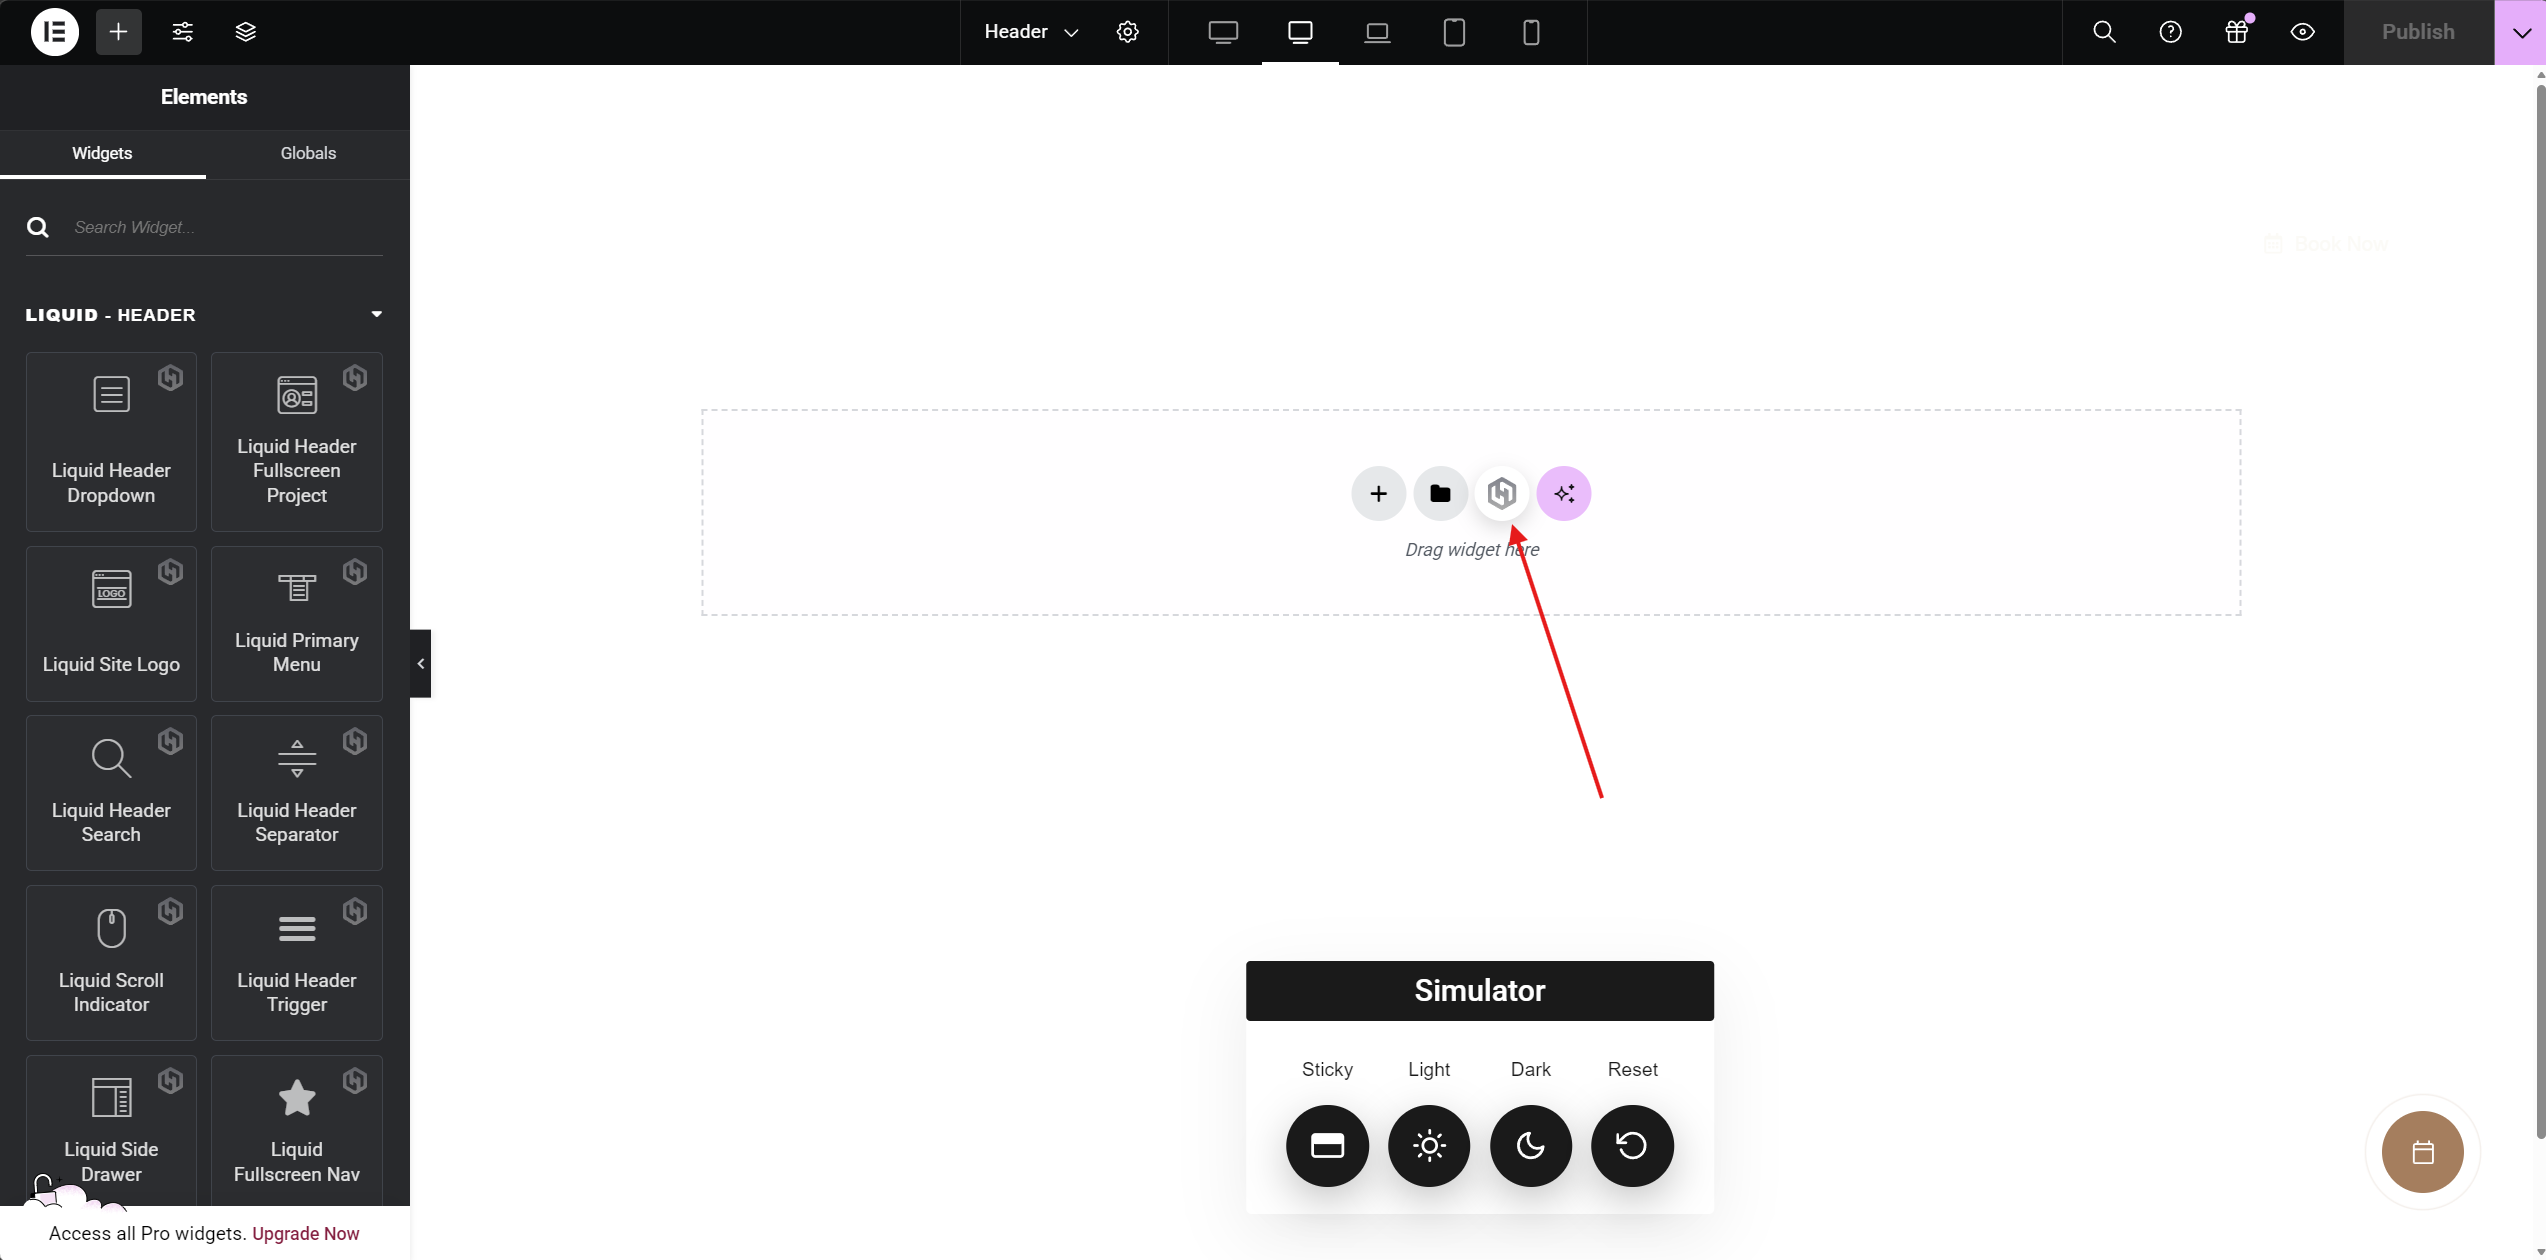
This opens the template library.
3.2 Select Headers from the category filter (top-left)
Filter the templates by selecting Headers.
3.3 Import your preferred header template
Choose a design you like and import it into your page.
Editing the Header Layout
4. Customize the header in Elementor
You can freely edit:
Logo
Menu
Buttons
Layout structure
Spacing & alignment
Colors and typography
Use the Liquid Header widgets (Logo, Primary Menu, Header Search, etc.) from the widget panel.
Adjusting Header Design Options
5. Click the Post Settings icon (top-left in Elementor)
This opens the settings panel for the header template.
6. Switch to Header Design Options
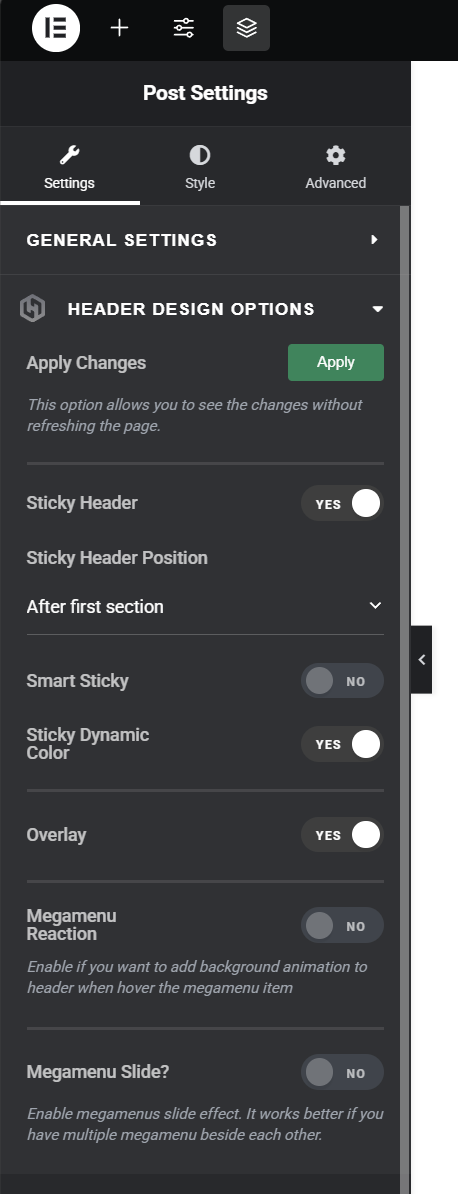
Here are the available options:
Sticky Header
Enables the header to stay visible when scrolling.Sticky Header Position
Choose when the sticky header becomes active (e.g., after the first section).Smart Sticky
Makes the header hide while scrolling down and reappear when scrolling up.Sticky Dynamic Color
Changes header color automatically when sticky mode is activated.Overlay
Makes the header overlap the page content (useful for hero sections).Megamenu Reaction
Adds background animation when hovering over megamenu items.Megamenu Slide
Enables slide animation effect for megamenu dropdowns.
After adjusting these settings, click Apply (if available) to preview changes.
7. Click Publish
Your header template is now ready.
How to Change Header Site-Wide (Global Header)
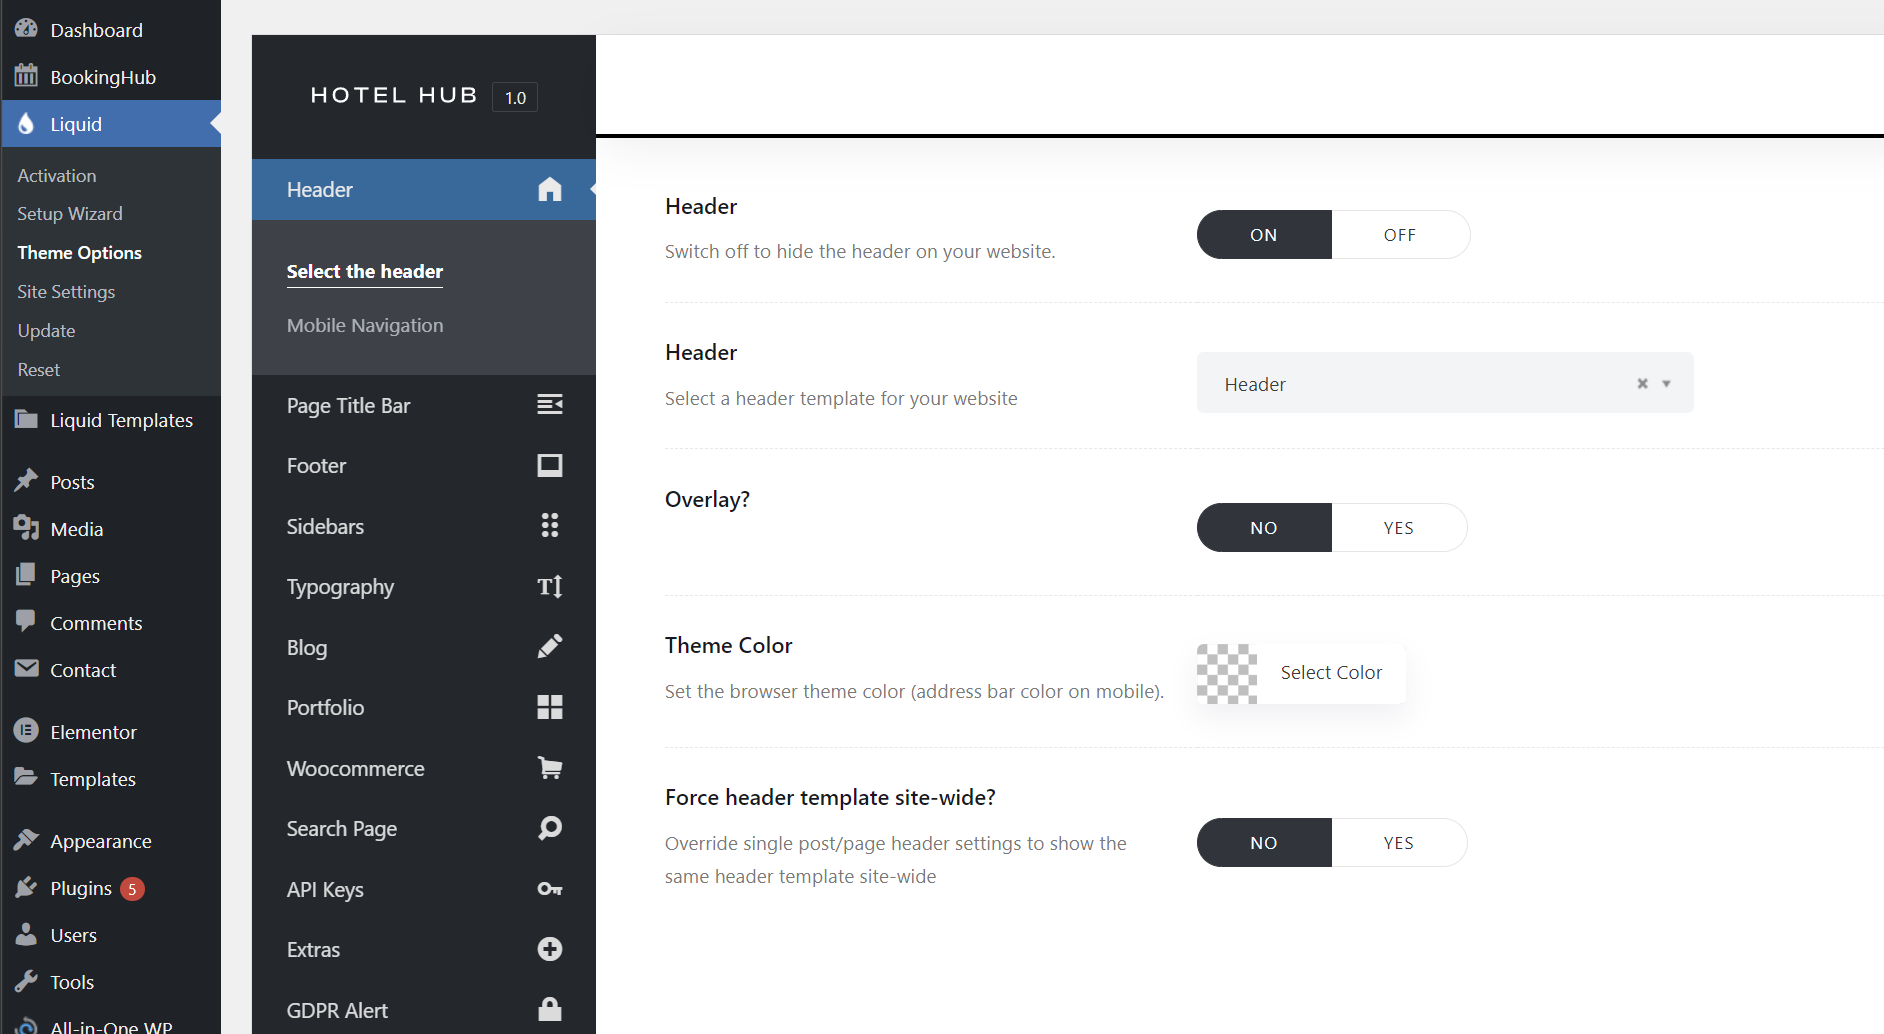
1. Go to Liquid → Theme Options → Header
This section controls global header behavior.
2. Review the available options:
Header (ON/OFF)
Enable or disable the header site-wide.Header Template
Select which header template will be used across the website.Overlay
Enable overlay mode globally.Theme Color
Sets the browser theme color (address bar color on mobile).Force Header Template Site-Wide
Overrides individual page settings and forces the selected header template everywhere.
3. Select your header template
Choose the header you created from the Header Template dropdown.
4. Save Changes
After saving, the selected header will be applied globally across the site.
How to Change Header for a Single Page
If you want to assign a different header to a specific page:
1. Open the page with Elementor
2. Click on Page Settings
3. Switch to the Page Header Options tab
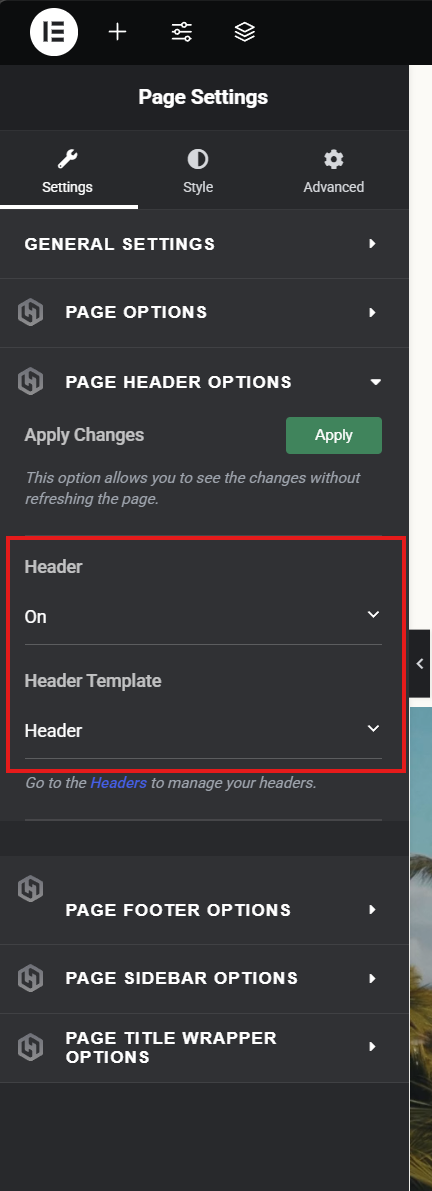
4. Change Header from Use Global Settings to On
5. Select the desired Header Template
The dropdown will appear below once enabled.
6. Save / Update the page
That’s it! The selected header will now be applied only to that page.
You can create multiple header templates for different use cases (transparent hero header, minimal header, landing page header, etc.) and assign them globally or per-page as needed.