Float Buttons allow you to display fixed-position buttons (such as Book Now, contact buttons, or modal triggers) anywhere on the screen. You can fully customize their design using Elementor and control their position via Float Button options.
Creating a Float Button Template
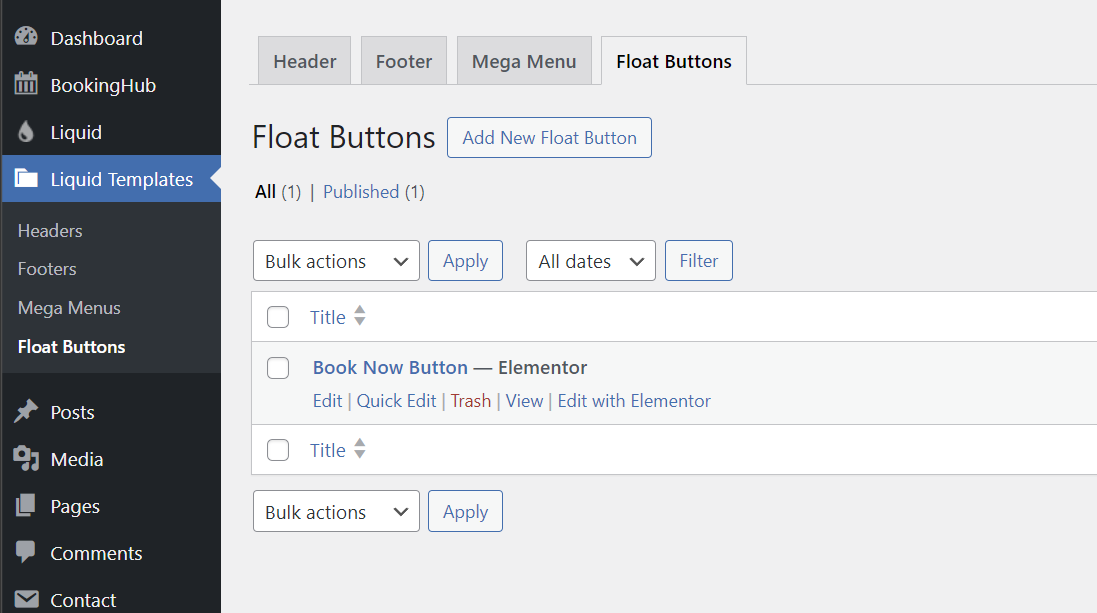
1. Go to Liquid Templates > Float Buttons
From your WordPress dashboard, navigate to:
Liquid Templates → Float Buttons
Here, you will see your existing float button templates.
2. Click on Edit with Elementor
If you already have a float button template, click Edit with Elementor.
If not, click Add New Float Button, publish it, then click Edit with Elementor.
Designing the Float Button in Elementor
3. Add your content inside Elementor
Inside the Elementor editor, you can build your float button layout.
Common structure:
Add a Container
Insert a Liquid Button
Optionally add a Liquid Modal Box (if you want the button to open a popup)
You can:
Customize button style
Add icon (e.g., calendar icon for booking)
Set modal content (form, text, booking form, etc.)
Adjust spacing and design
Use Elementor’s styling options to match your website branding.
Adjusting Float Button Position & Behavior
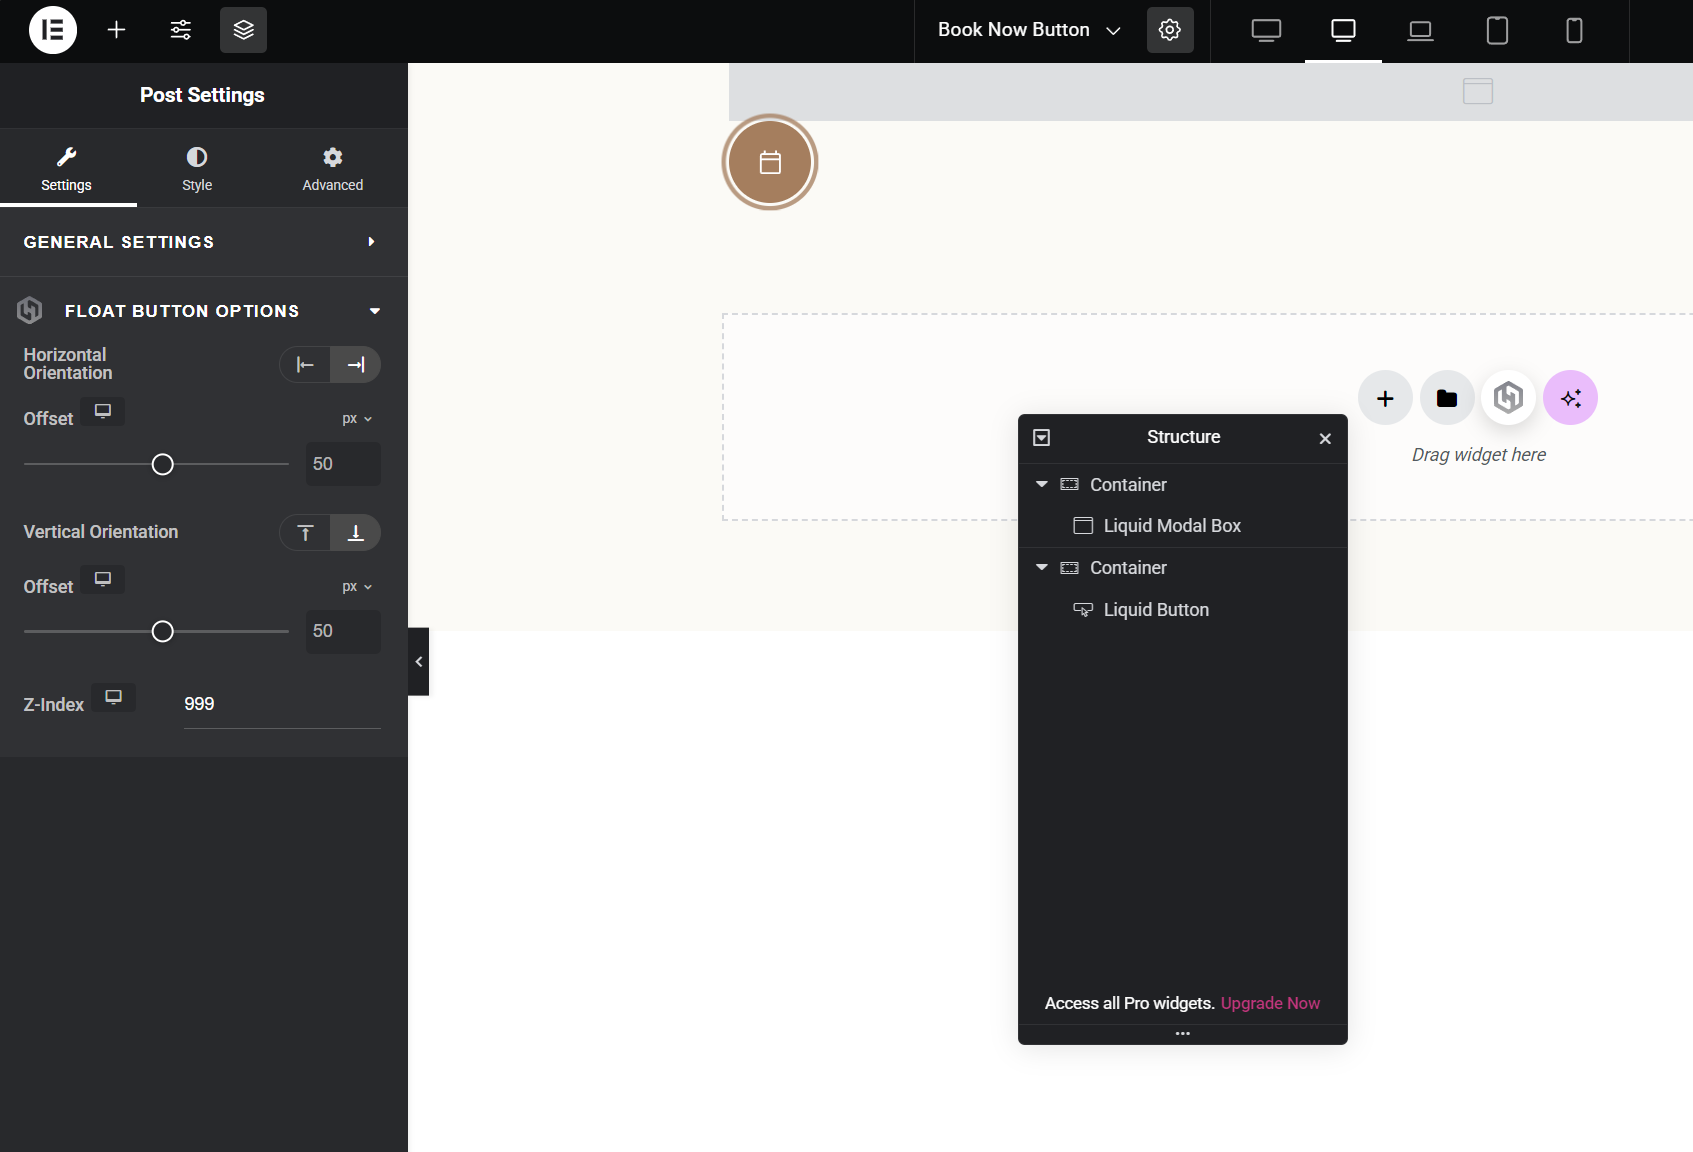
4. Click the Post Settings icon (top-left in Elementor)
Open the template settings panel.
5. Switch to Float Button Options
You will see the following options:
Horizontal Orientation
Choose whether the float button appears on the left or right side of the screen.Horizontal Offset
Adjust the distance from the left/right edge (in pixels).Vertical Orientation
Choose whether the float button is positioned from the top or bottom.Vertical Offset
Adjust the distance from the top/bottom edge (in pixels).Z-Index
Controls stacking order. Increase this value if the button appears behind other elements.
Adjust these values until the button is positioned exactly where you want it.
6. Click Publish
Your float button template is now ready.
Enabling Float Buttons Site-Wide
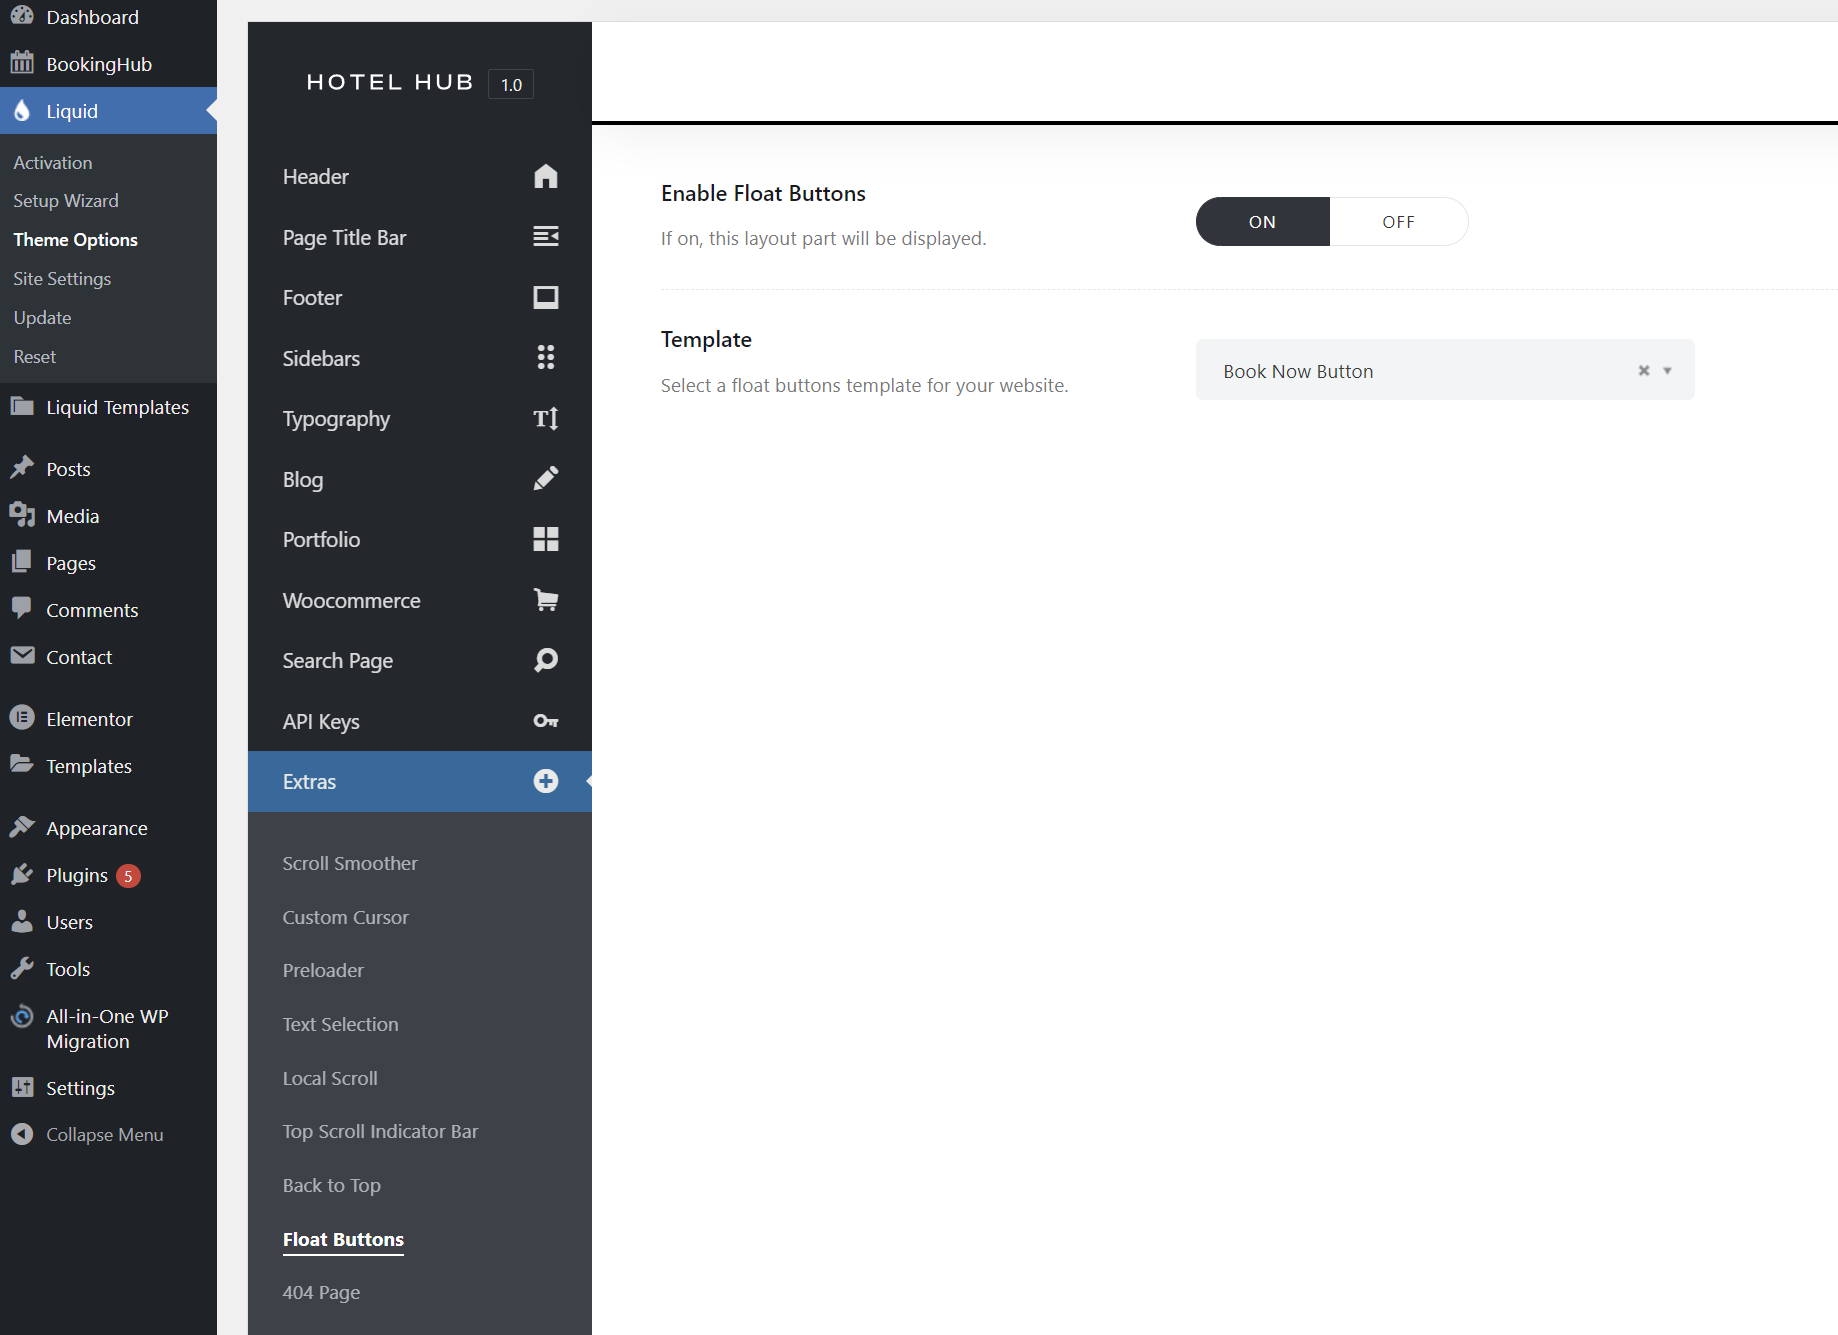
1. Go to Liquid → Theme Options → Extras → Float Buttons
This is where float buttons are activated globally.
2. Enable Float Buttons
Turn Enable Float Buttons to ON.
3. Select Your Template
From the Template dropdown, choose the float button template you created.
4. Save Changes
After saving, your float button will appear on the website.
Best Practices
You can create multiple float button templates for different purposes, such as:
Booking button
Contact button
WhatsApp button
Back to top button
Modal-based quick reservation form
Simply create different templates and switch between them from:
Liquid → Theme Options → Extras → Float Buttons
Float Buttons are a powerful way to increase conversions by keeping important actions visible at all times.