HotelHub natively supports custom fonts, so you don’t need to use any 3rd party plugin.
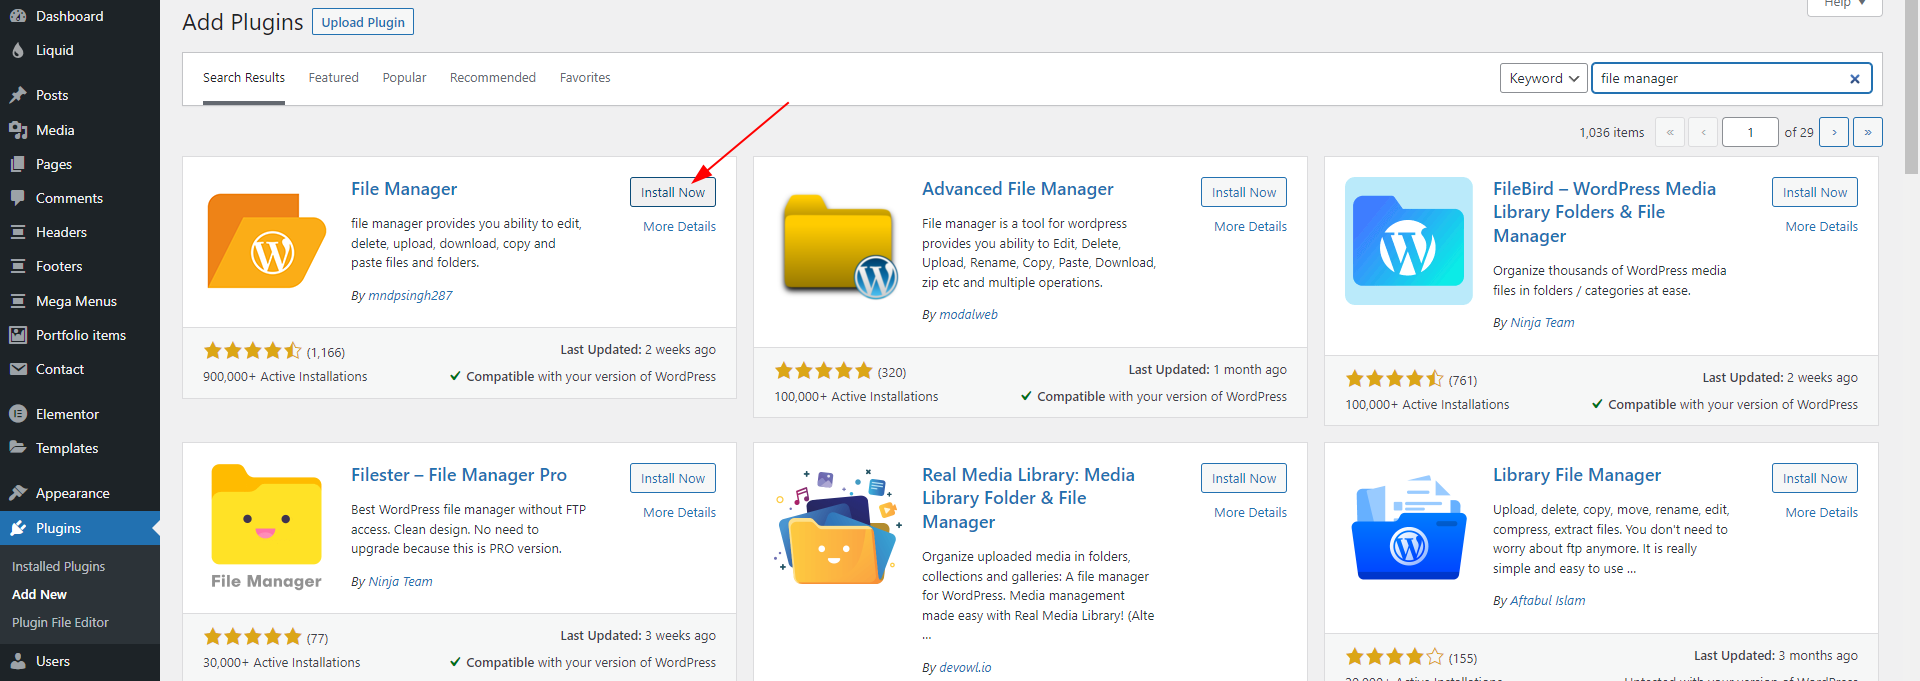
1- Install a File Manager plugin on your site.
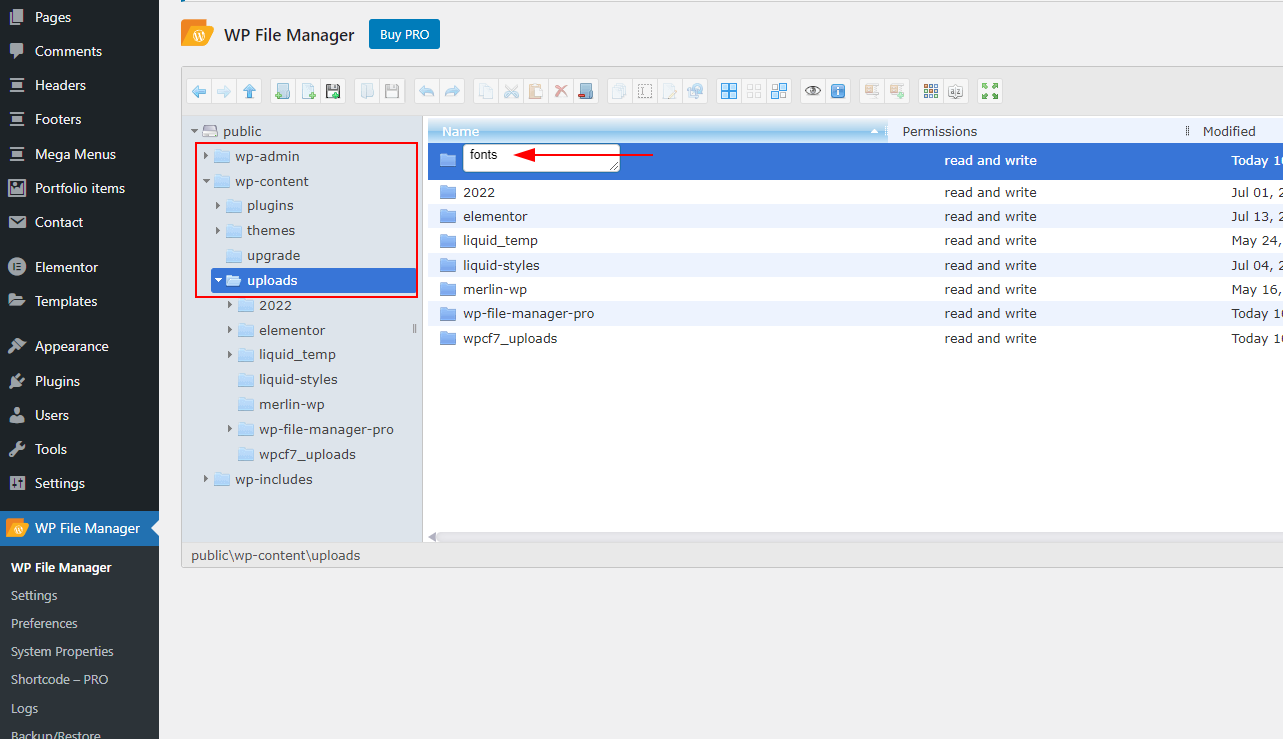
2- Create a folder named “fonts” in the /wp-content/uploads directory.
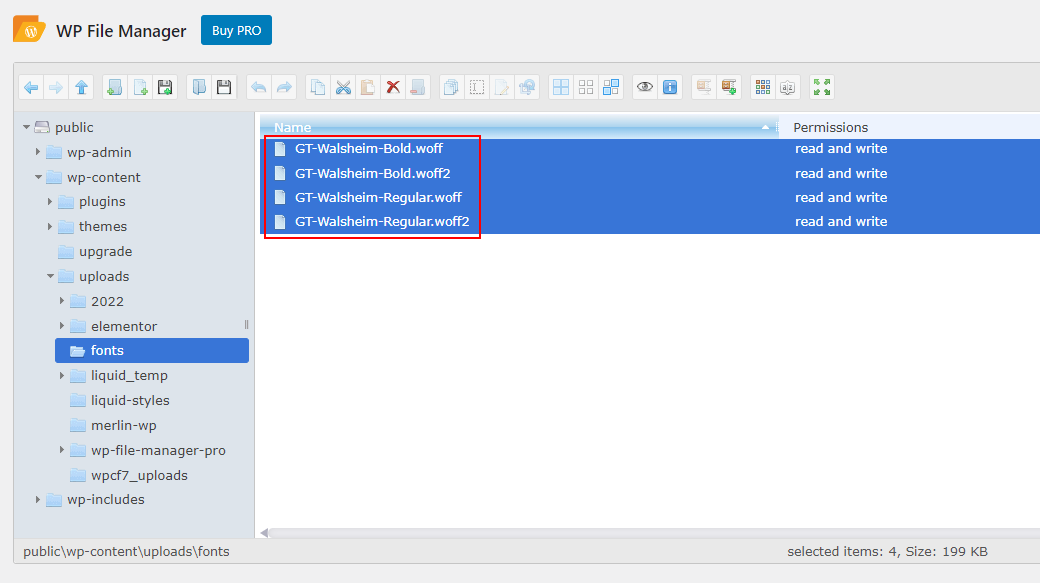
3- Upload the font files with .woff and .woff2 extensions into the fonts folder. (woff & woff2 extensions are recommended for better browser compatibility.)
After the upload, make sure the font files are publicly accessible by checking the file URLs. For example: https://yoursite.com/wp-content/uploads/fonts/yourfontname.woff
4- Navigate to Theme Options > Typography > Custom Fonts page. Here you need to define the font properties.
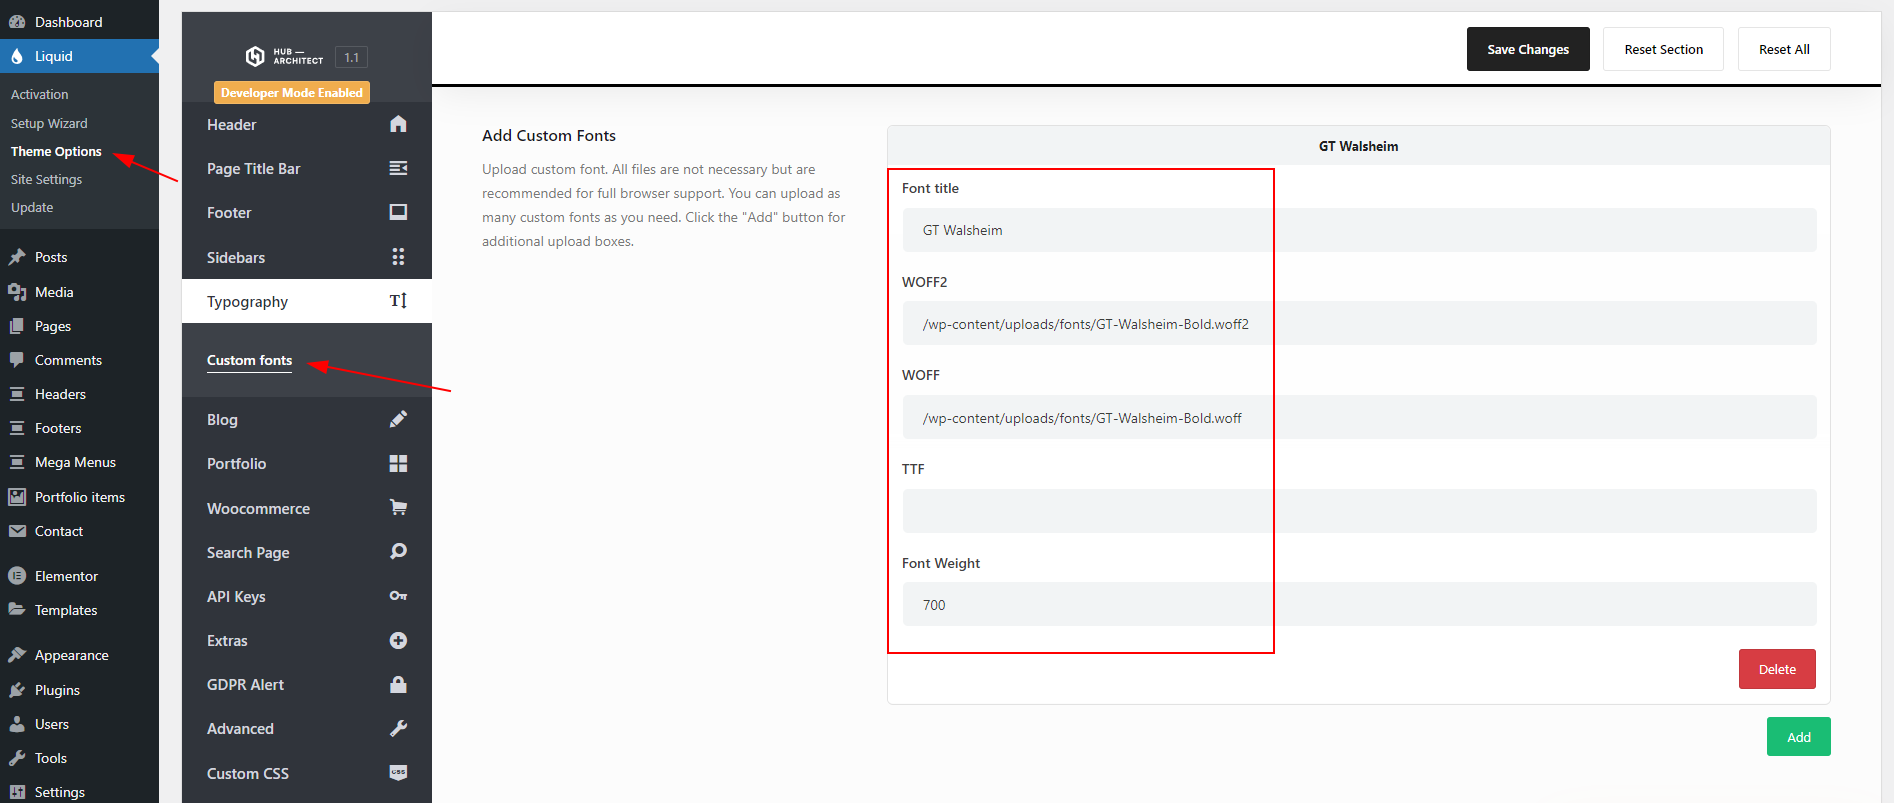
– Font title: Enter the name of the font that will be displayed on your site
– WOFF2: Enter the path to the font file with the .woff2 extension
– WOFF: Enter the path to the font file with the .woff extension
– TTF: Enter the path to the font file with the .ttf extension (TTF files not recommended)
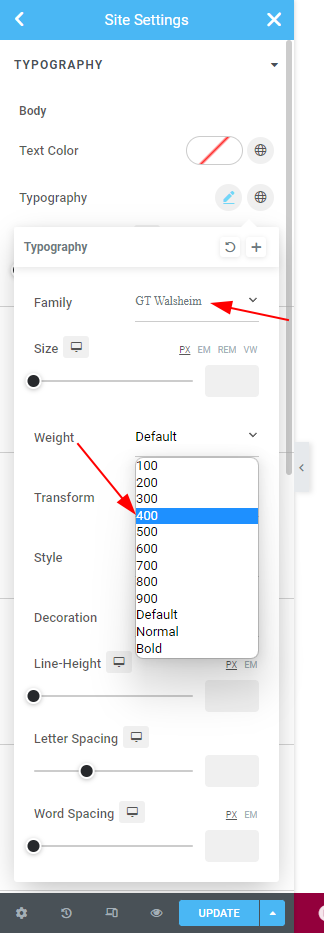
– Font Weight: Define the weight of the font. For example, enter 700 if the font is bold, 500 if it is medium, and 400 if it is regular.
5- Adding Multiple Weights of the Same Font
You can upload multiple weights (e.g., 300, 400, 500, 700) of the same font using the same Font Title. When you do this, the font will appear only once in the font family list.
Each weight you upload is linked to its corresponding font file. So, when you select a specific Font Weight in your page builder, the system automatically uses the matching font file for that weight.
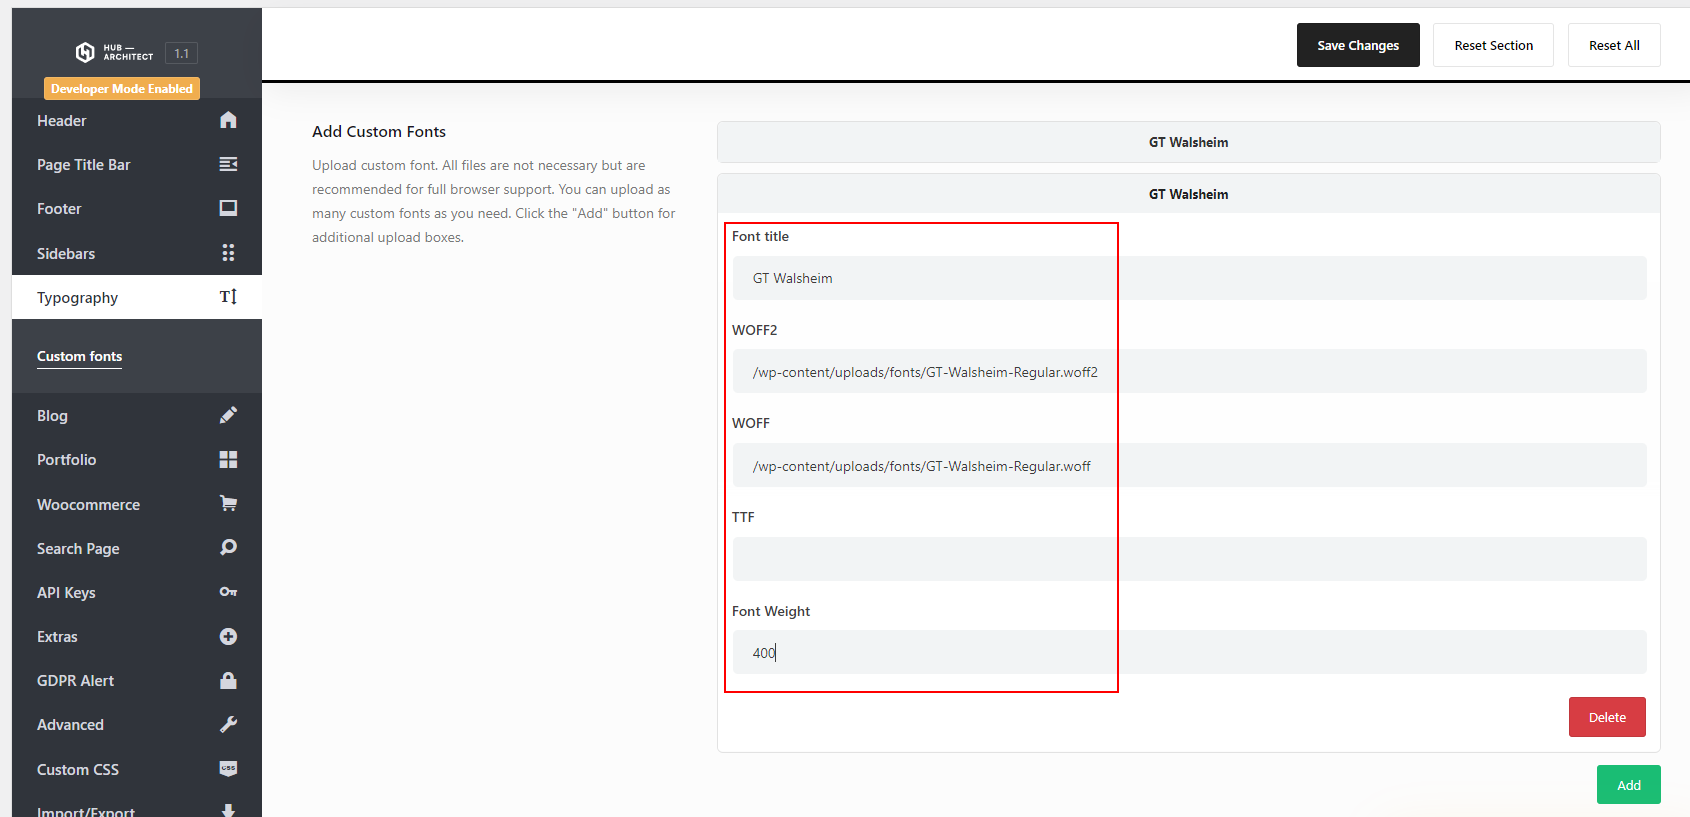
In the Elementor example shown, several weights of GT Walsheim were uploaded under the same font title. When the weight 400 is selected, Elementor automatically loads the font file assigned to weight 400.