BookingHub’s Email Notifications system allows you to automatically send emails to customers and admins based on booking events. You can manage confirmation emails, cancellation emails, reminders, and fully custom notifications — all from a single interface.
To access this page, go to:
WordPress Dashboard → BookingHub → Email Notifications
Confirmation Emails
The Confirmation section controls the email sent after a booking is successfully completed.
How to Configure
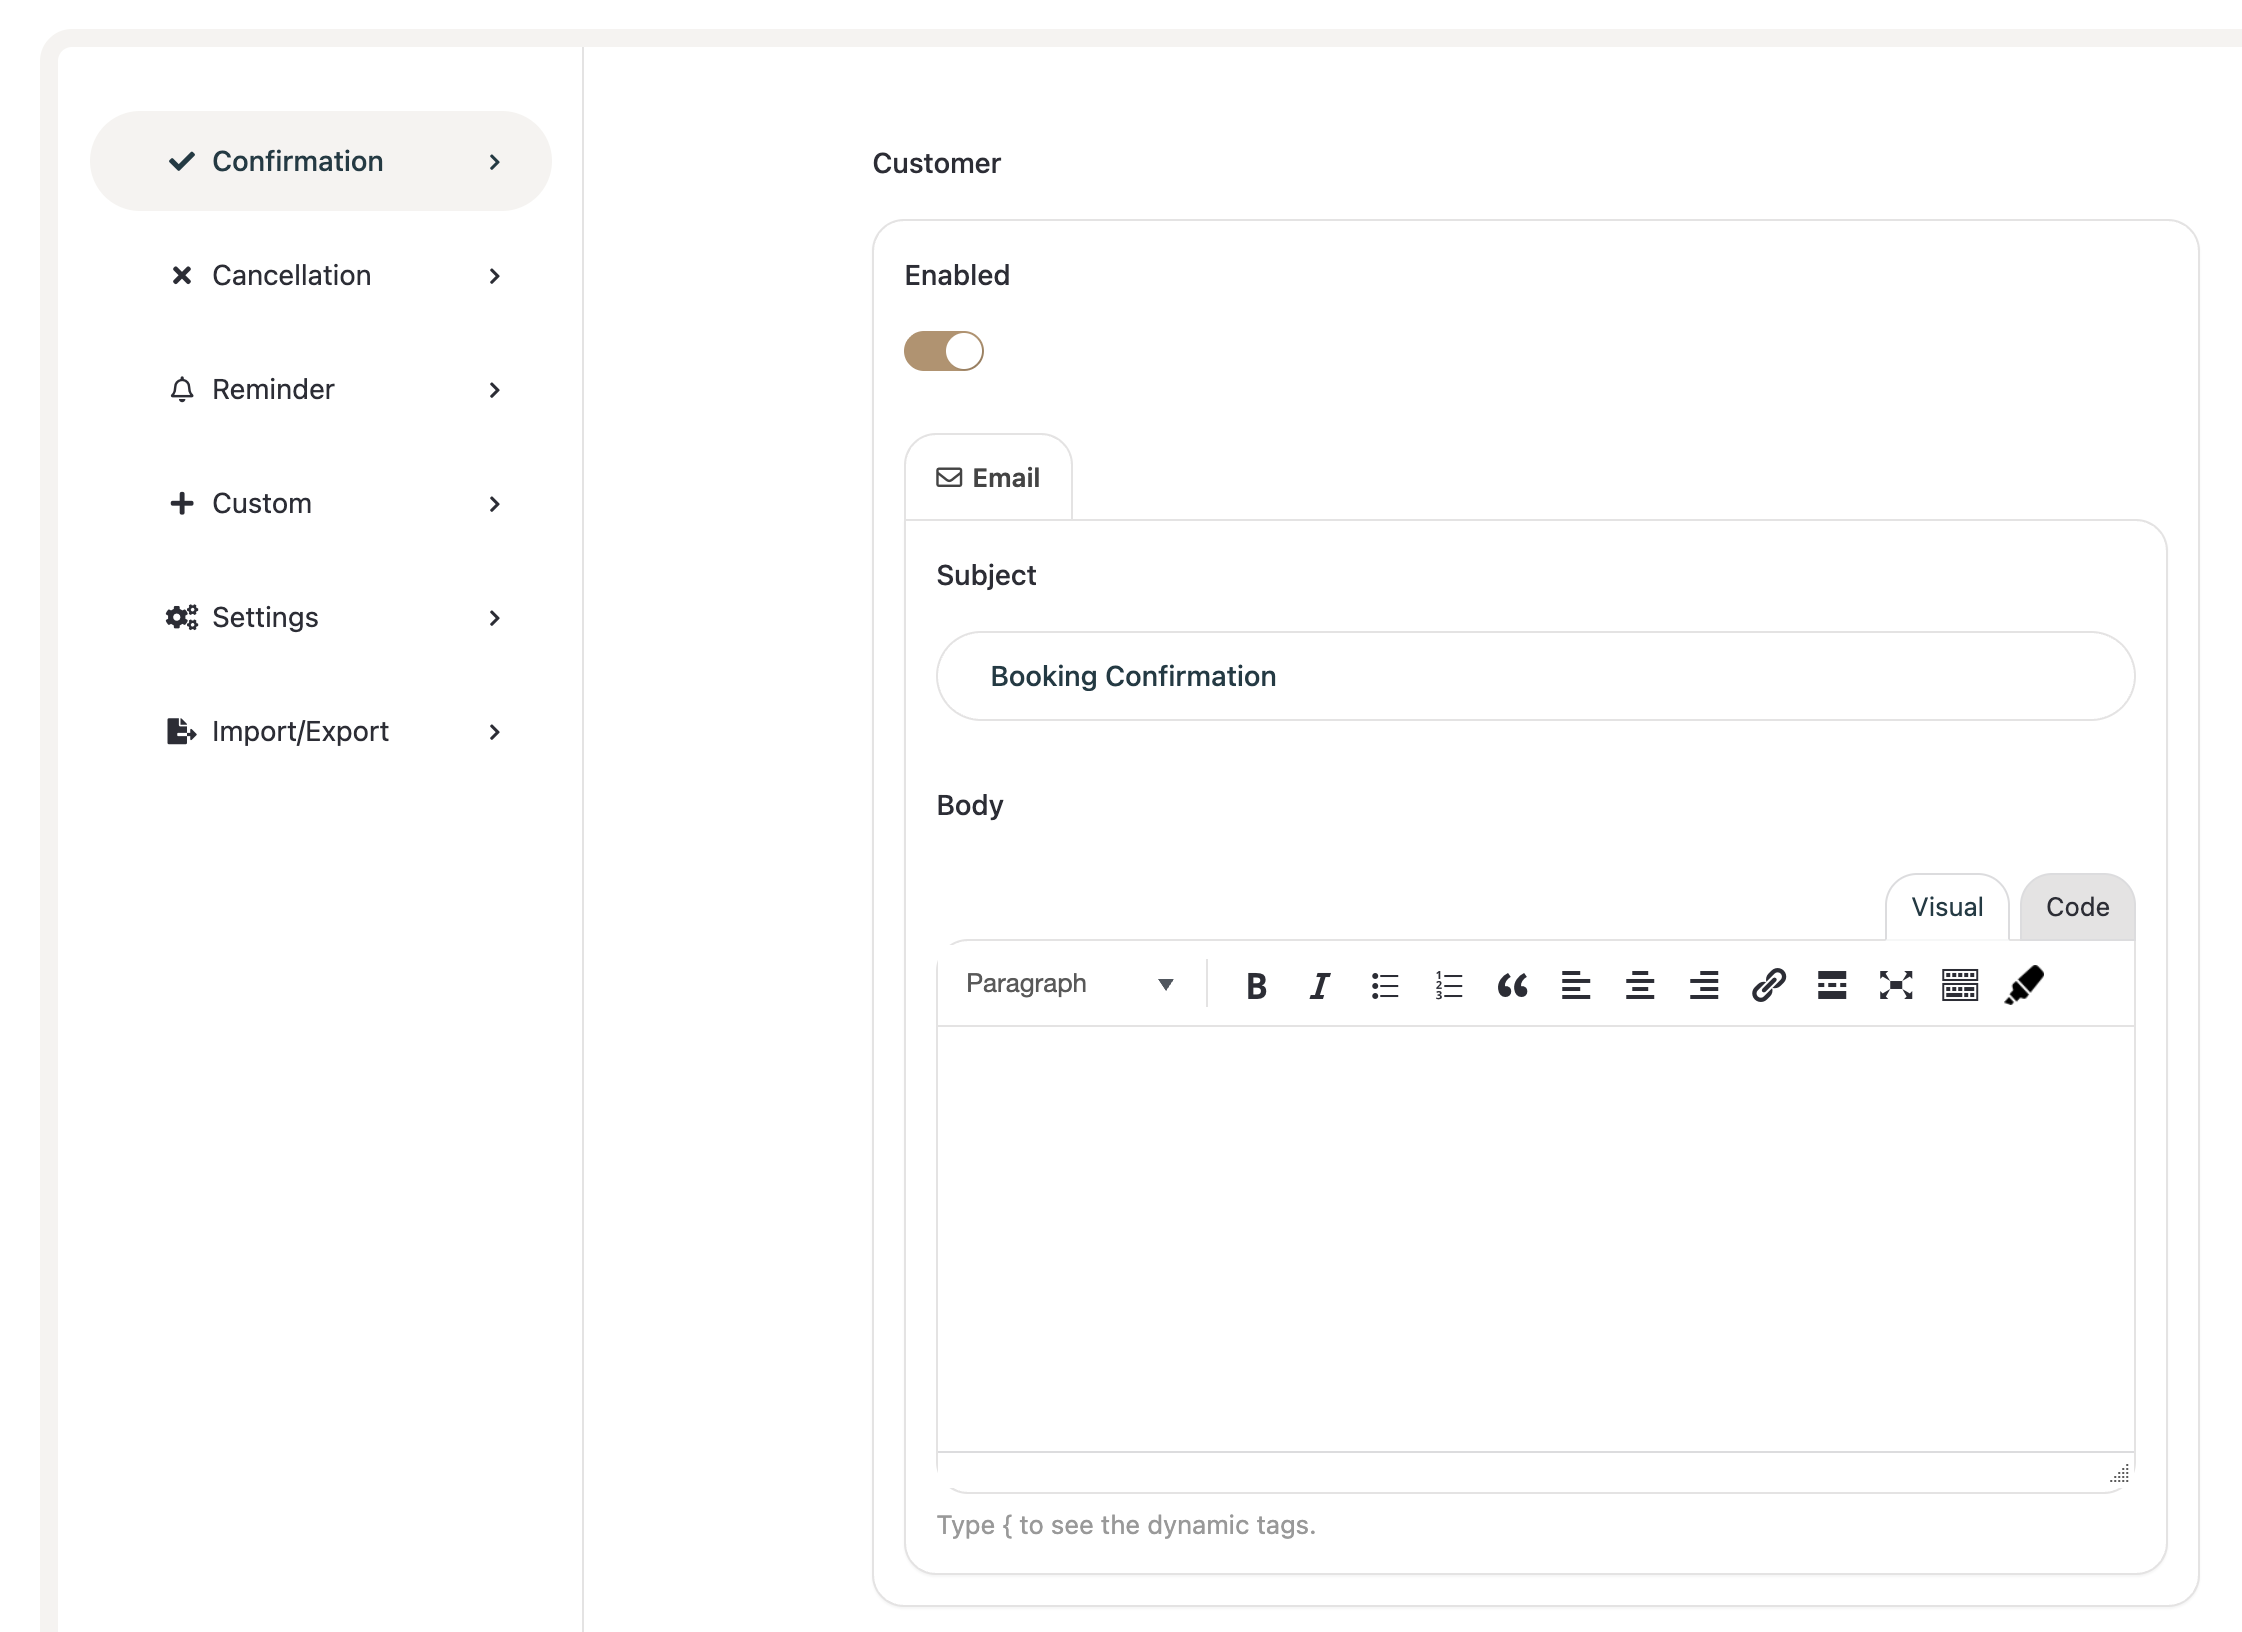
Go to Confirmation from the left panel.
Toggle Enabled to activate or deactivate confirmation emails.
Under the Email tab:
Set the Subject (e.g., Booking Confirmation).
Customize the Body using the visual editor.
Use dynamic tags by typing
{inside the editor to insert booking-related variables such as:{customer_name}{service_name}{check_in_date}{check_out_date}
Click Save to apply changes.
💡 Tip: Always include key booking details in your confirmation email to improve customer experience.
Cancellation Emails
The Cancellation section allows you to configure automatic emails when a booking is cancelled.
Steps
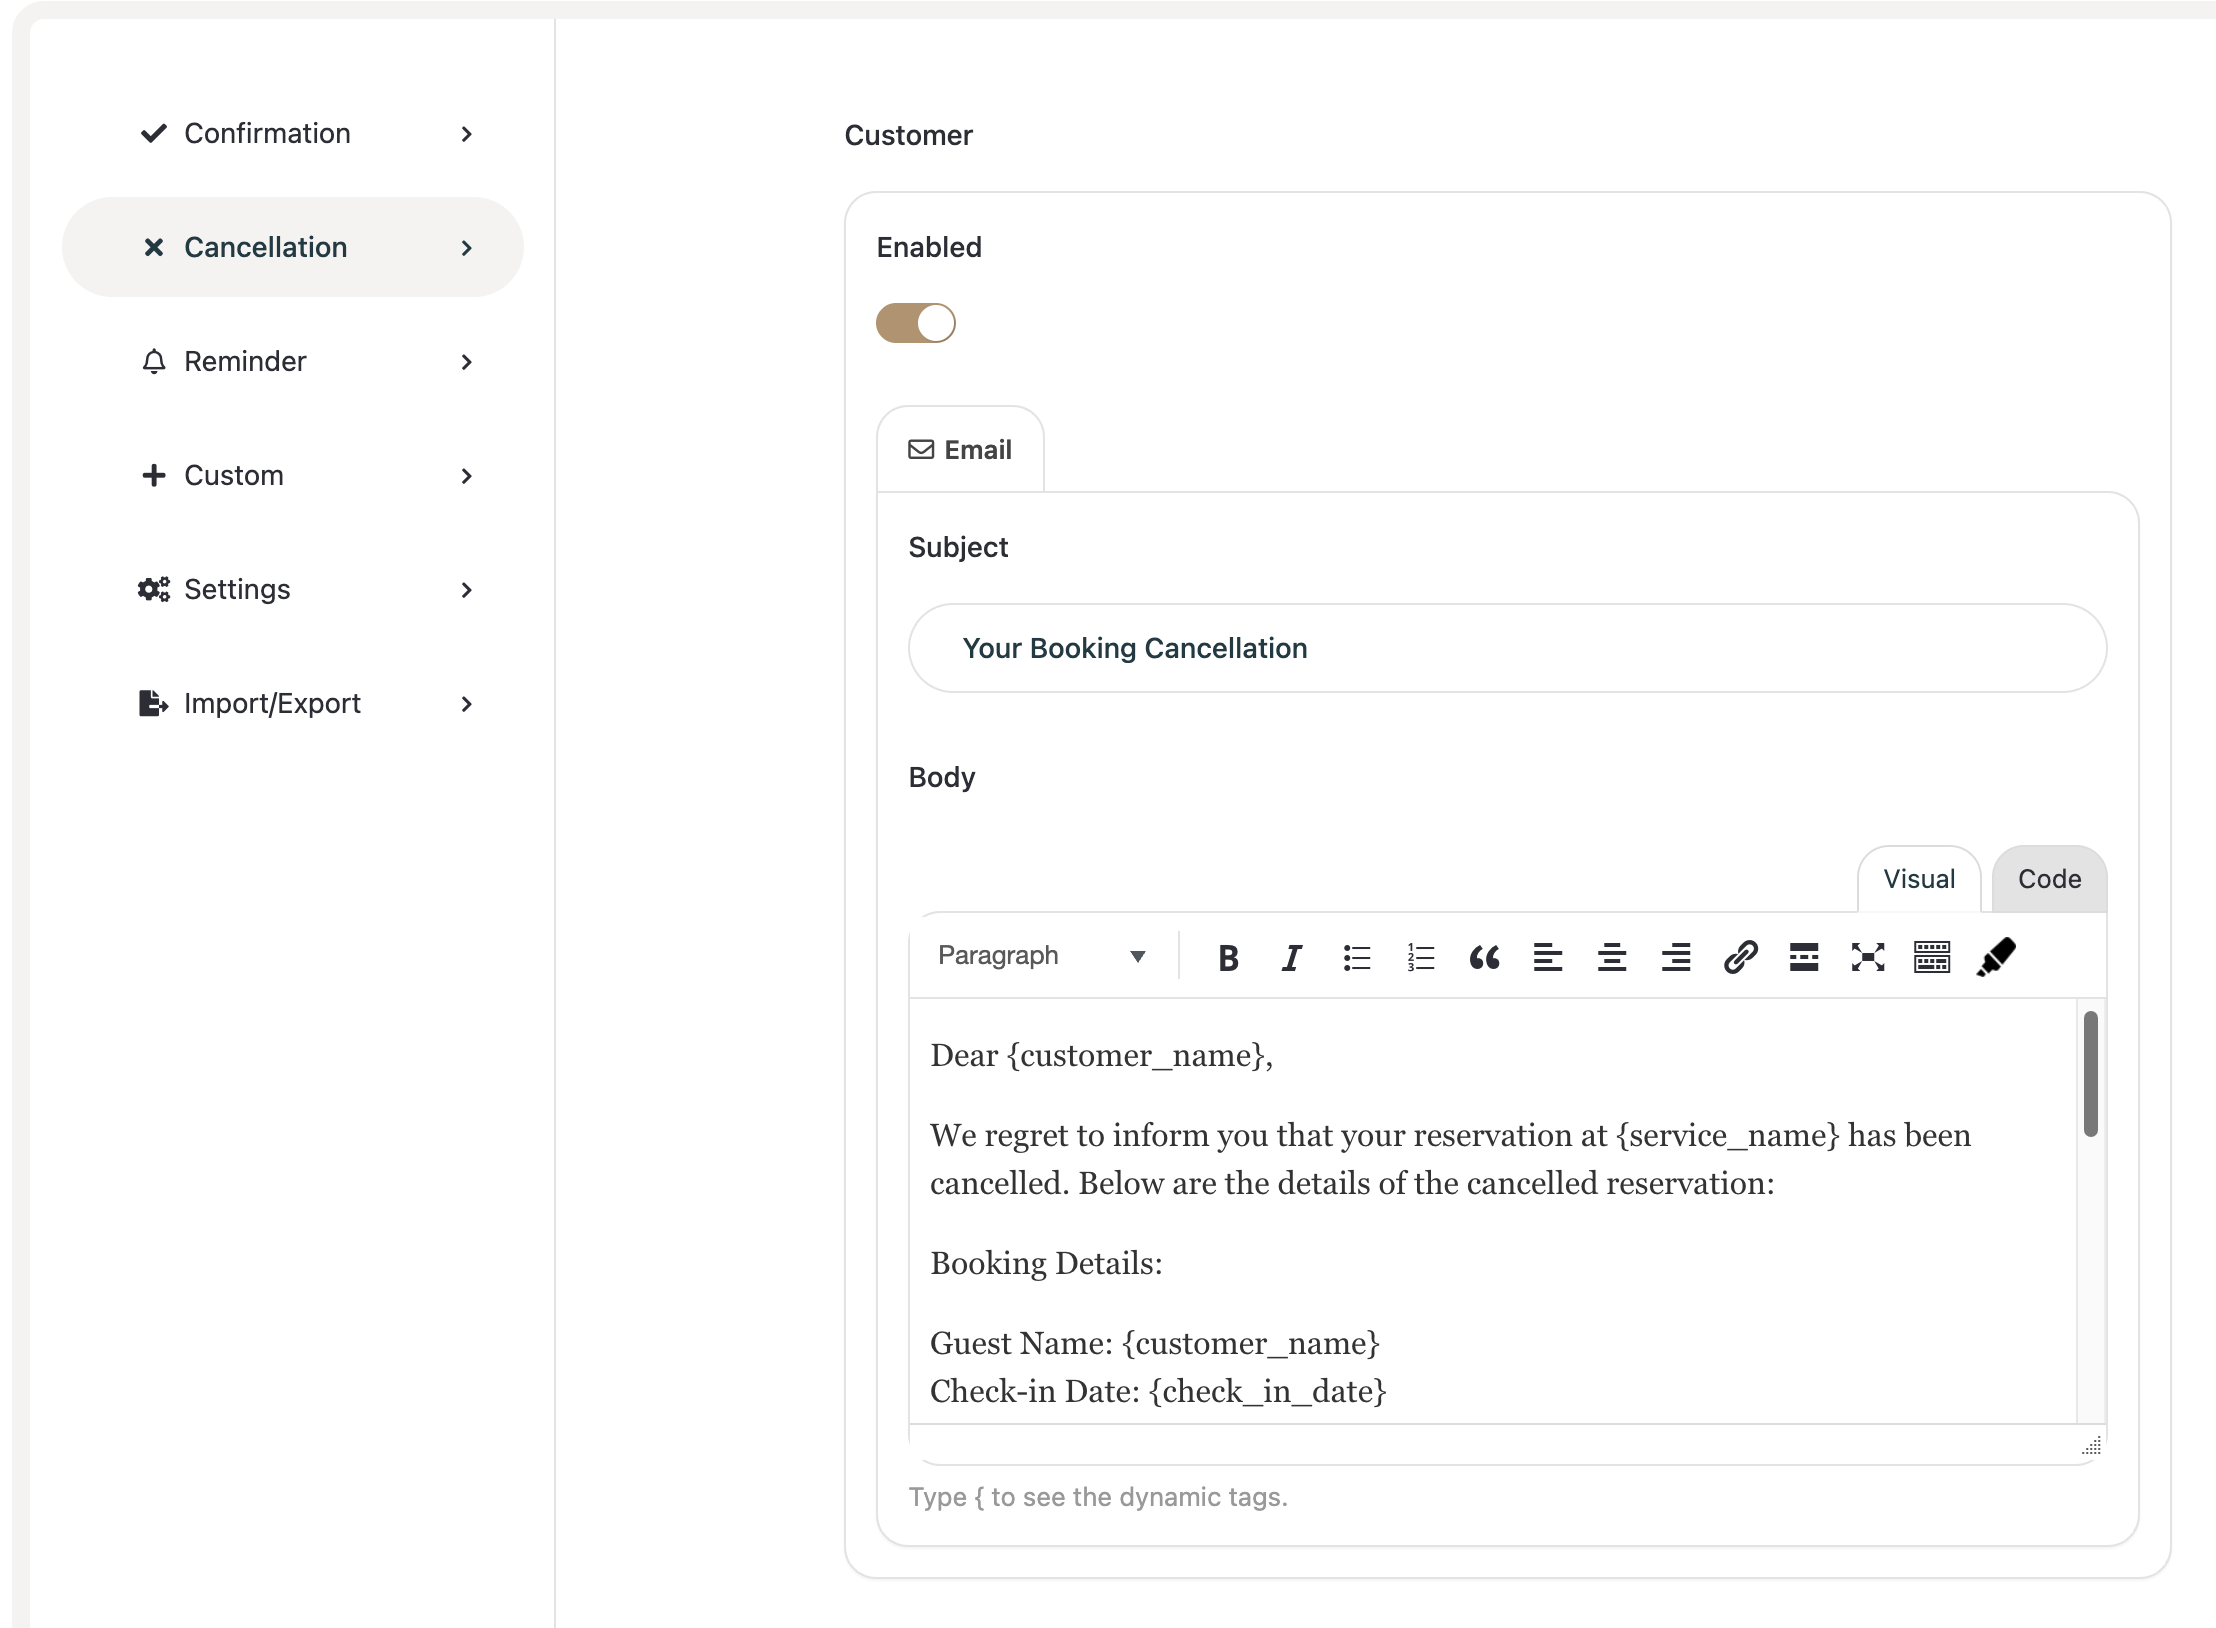
Click Cancellation from the sidebar.
Enable the toggle to activate cancellation emails.
Customize:
Subject (e.g., Your Booking Cancellation).
Body content with booking details and cancellation information.
Insert dynamic tags where needed.
Click Save.
This ensures customers are immediately informed when a reservation is cancelled.
Reminder Emails
Reminder emails help reduce no-shows by notifying customers before their stay.
How to Set Up
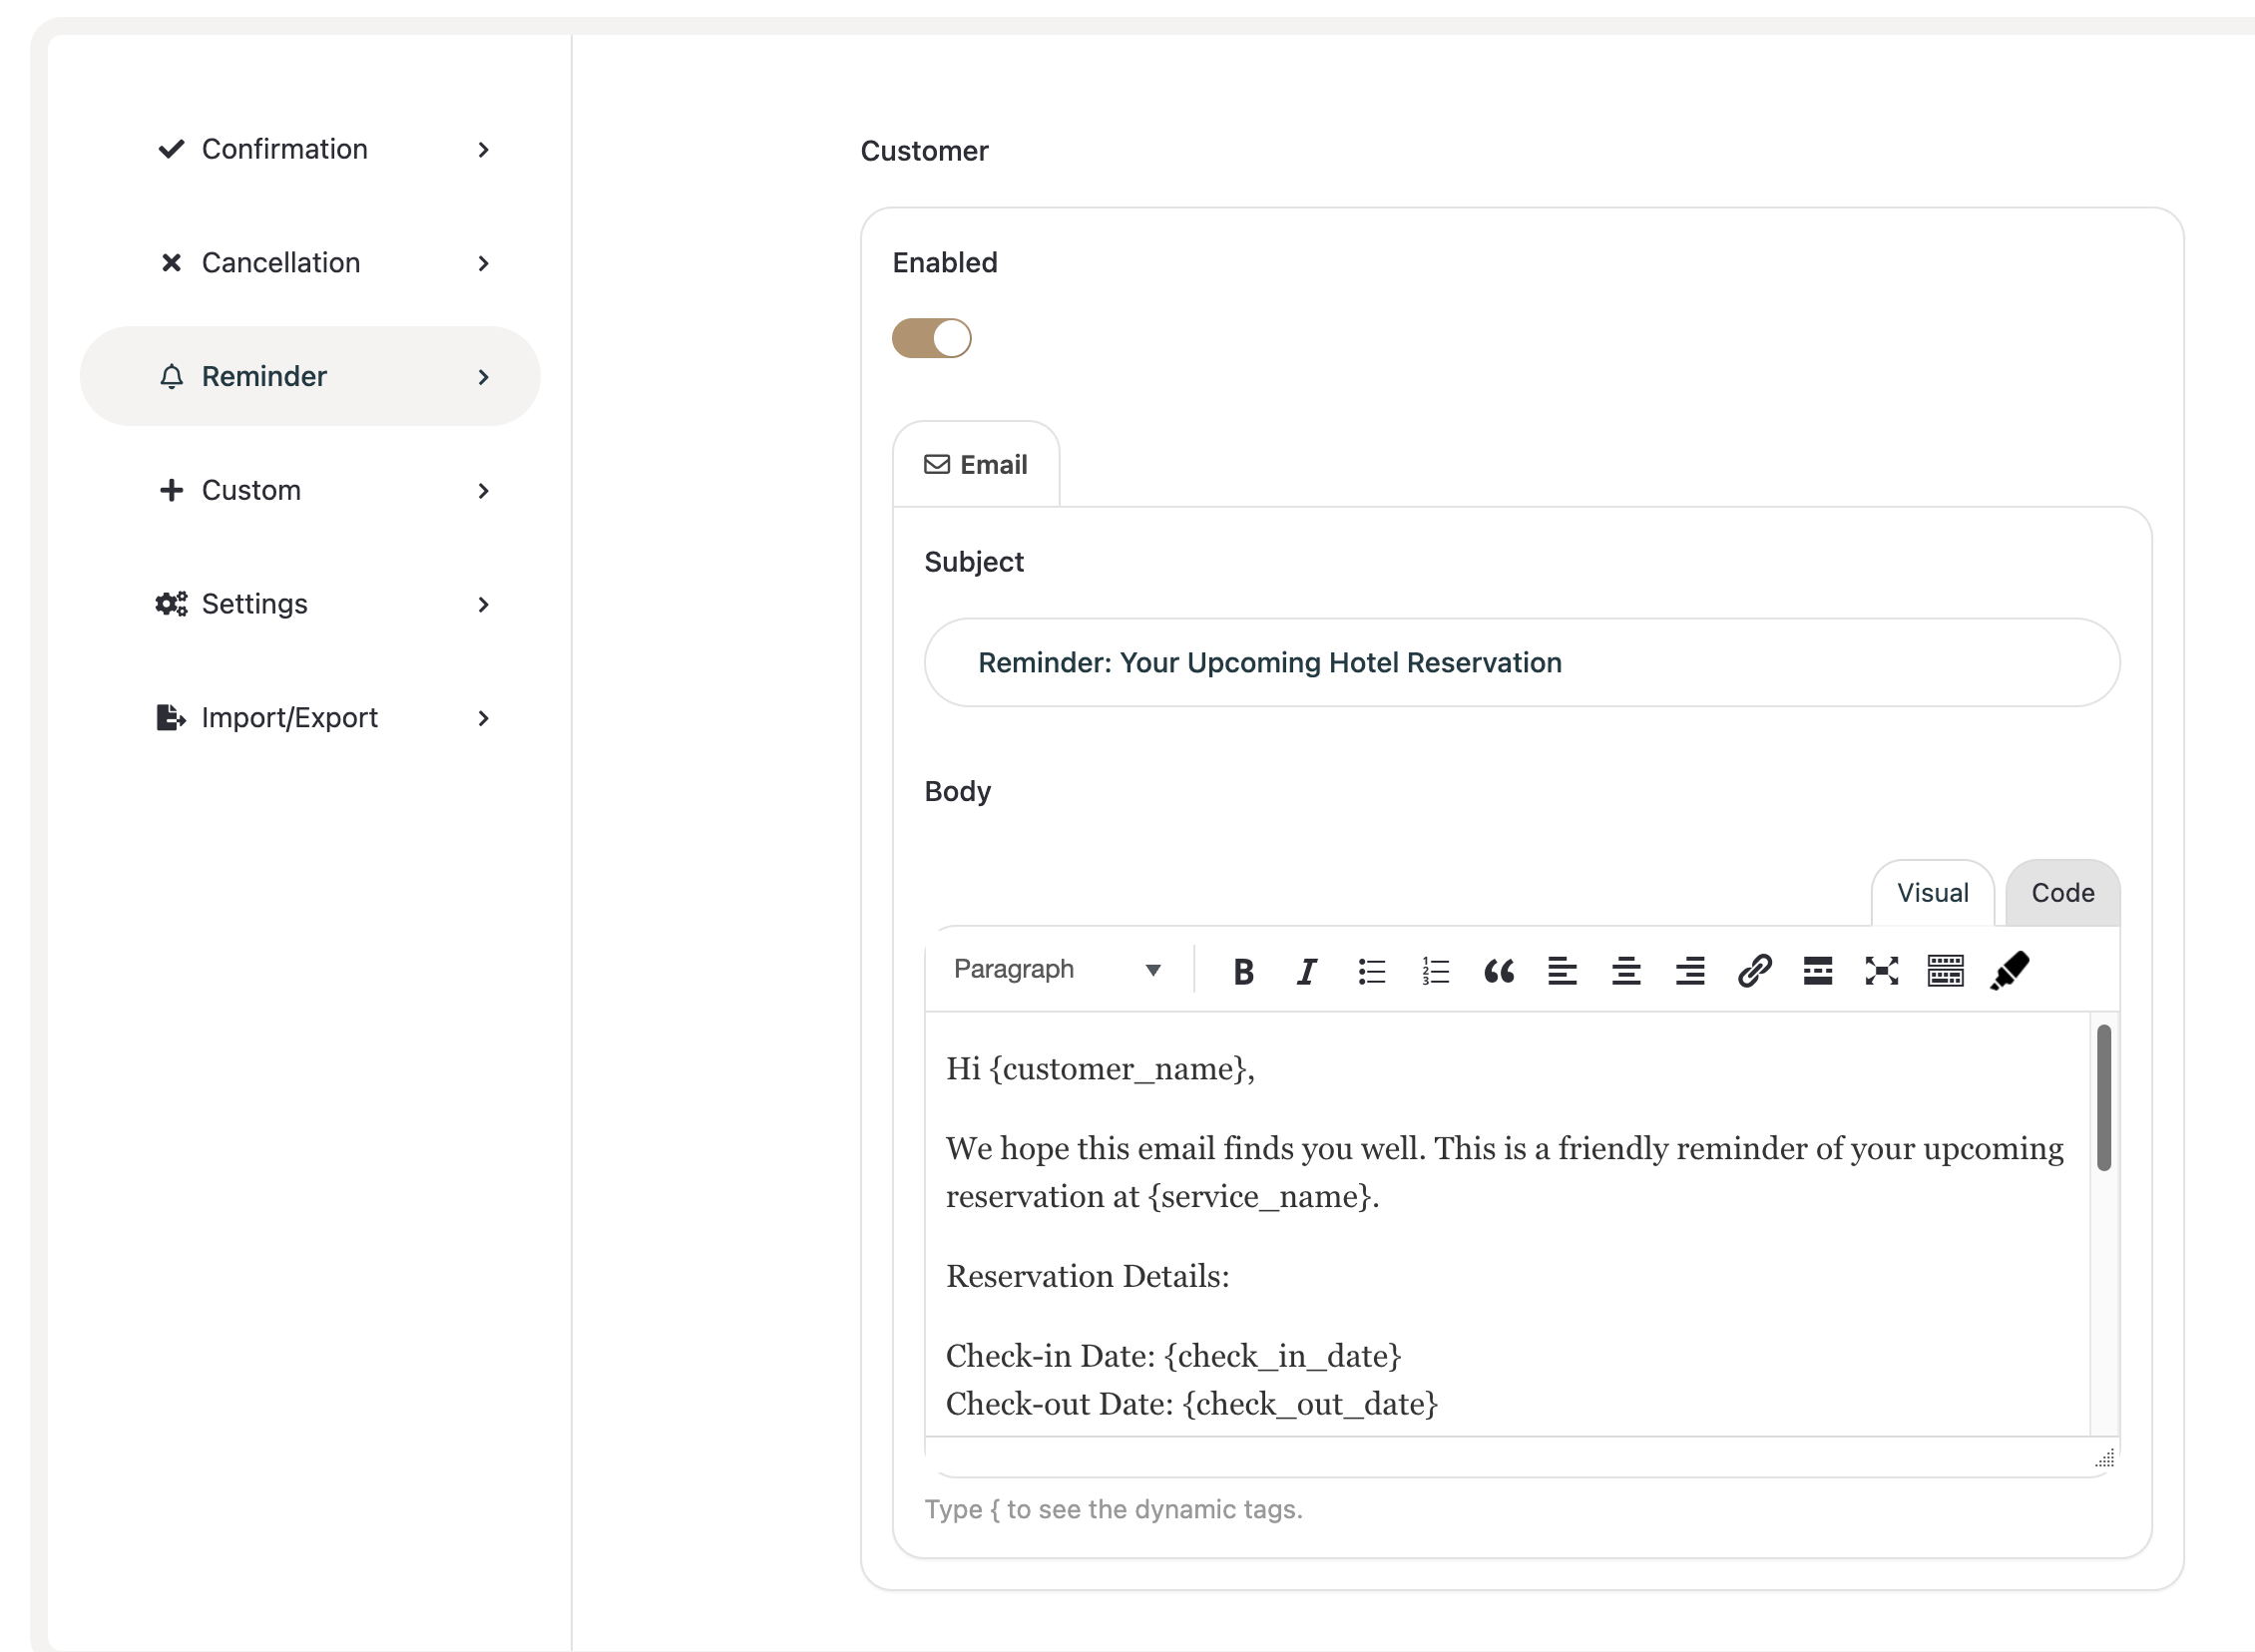
Navigate to Reminder.
Enable the notification.
Set the Subject (e.g., Reminder: Your Upcoming Hotel Reservation).
Customize the Body message.
Add dynamic fields such as:
{check_in_date}{check_out_date}{service_name}
Save your changes.
You can use this feature to send friendly reminders before check-in.
Custom Notifications
The Custom section gives you full flexibility to create additional automated emails based on specific triggers.
Creating a Custom Notification

Go to Custom.
Click Add New (or create a new notification block).
Enter a Title (for internal management).
Enable the notification.
Select a Trigger (e.g., Booking Completed).
Choose Recipients:
Customer
Admin
Custom email address
Define:
Subject
Body
Save the notification.
This is useful for:
Sending internal alerts to staff
Sending follow-up emails
Sending promotional messages after booking completion
Email Settings

The Settings section controls global email configuration.
Available Options
From Email – The sender email address.
From Name – The sender name displayed in inboxes.
Email Footer – Custom footer content added to all outgoing emails.
You can use dynamic tags like:
{company_name}{company_address}
After updating settings, click Save.
⚠️ Make sure your website’s email configuration (SMTP or hosting mail setup) is properly configured to ensure deliverability.
Import / Export Email Settings
The Import/Export section allows you to back up or transfer your email notification settings.
Options Available
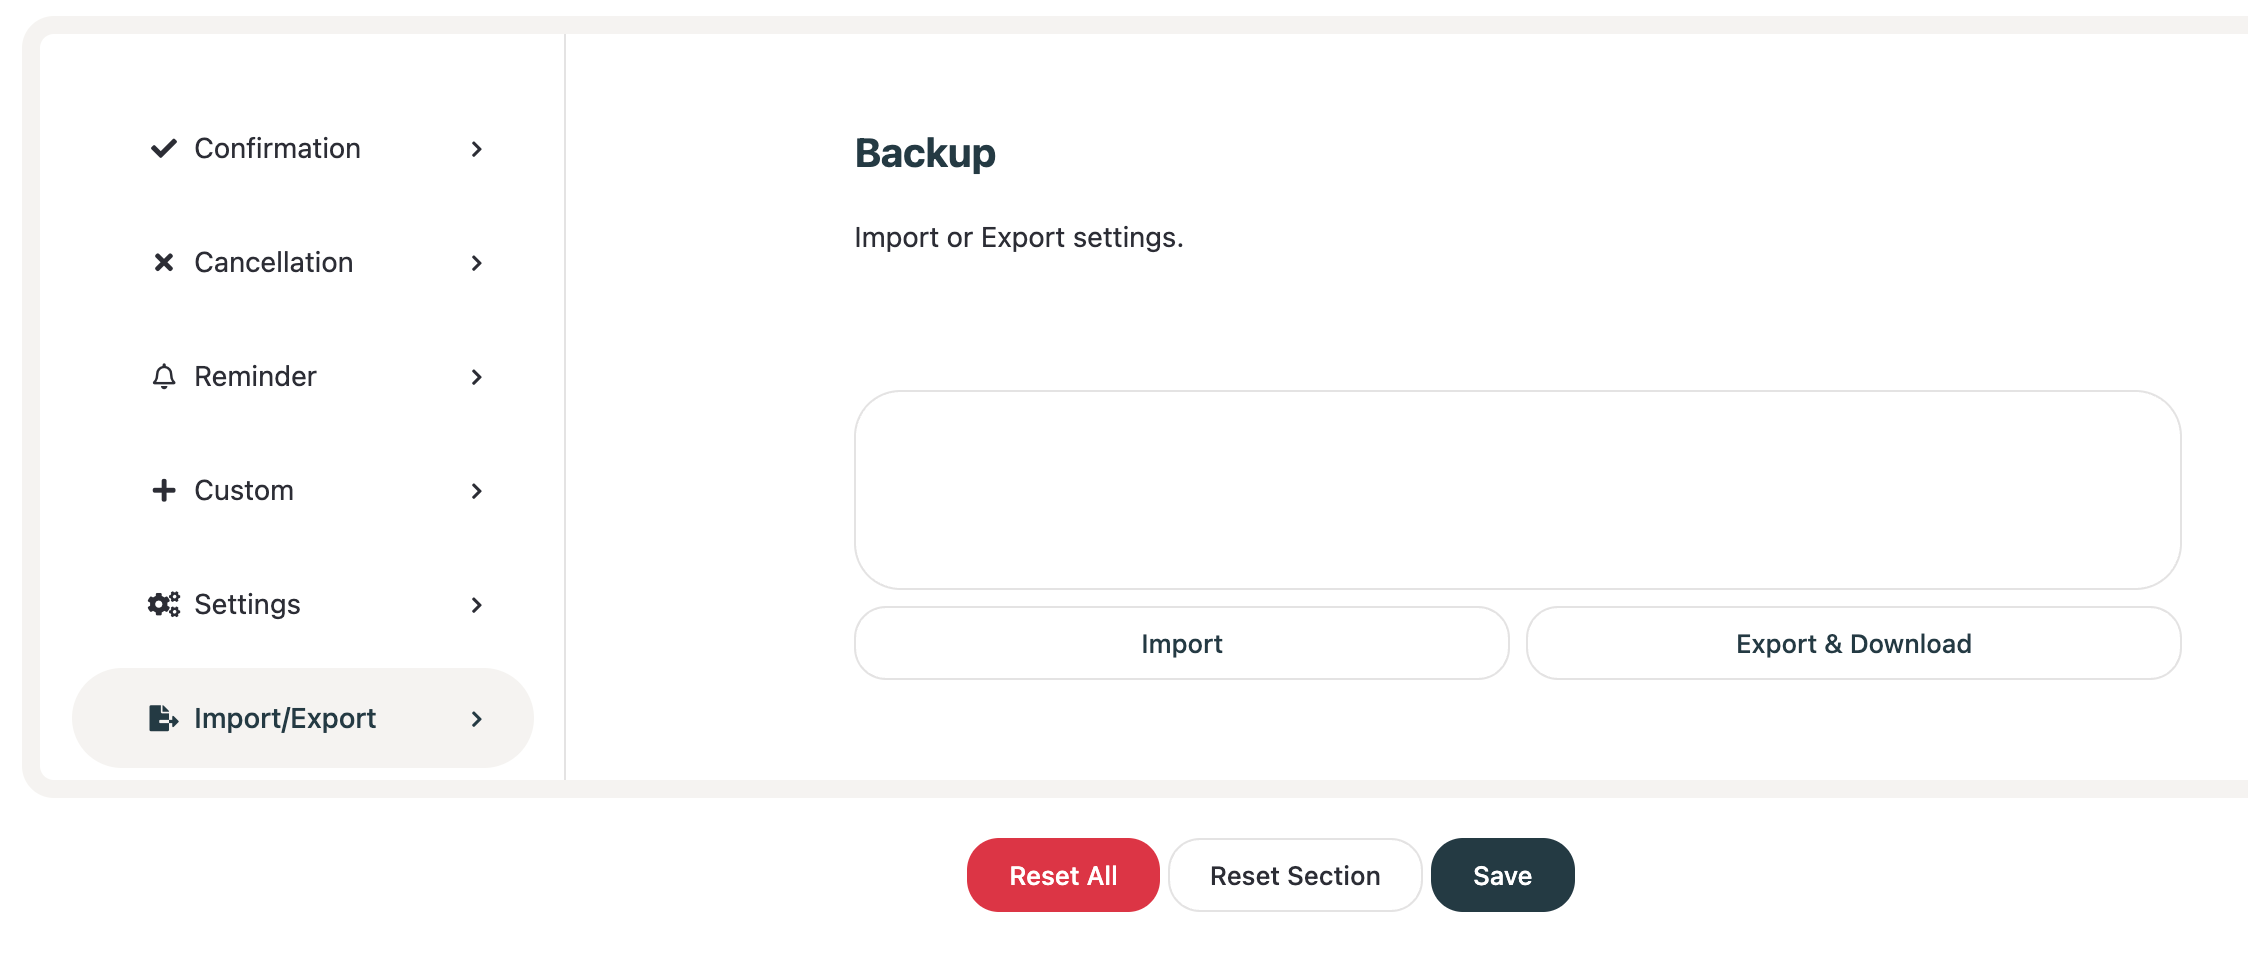
Import – Upload previously exported settings.
Export & Download – Download current email notification configuration.
This is useful when:
Migrating to another website
Creating backups
Reusing the same configuration across multiple hotel websites
Saving & Resetting Changes
At the bottom of the page, you’ll find:
Reset All – Restores all email settings to default.
Reset Section – Resets only the current section.
Save – Saves your changes.
Always click Save after making modifications.
Best Practices
Keep subject lines clear and professional.
Include essential booking details.
Test emails after configuration.
Ensure SMTP is configured for reliable email delivery.
Use reminders to reduce cancellations and no-shows.
With BookingHub’s Email Notifications system, you can fully automate communication with your guests and streamline your hotel booking workflow.